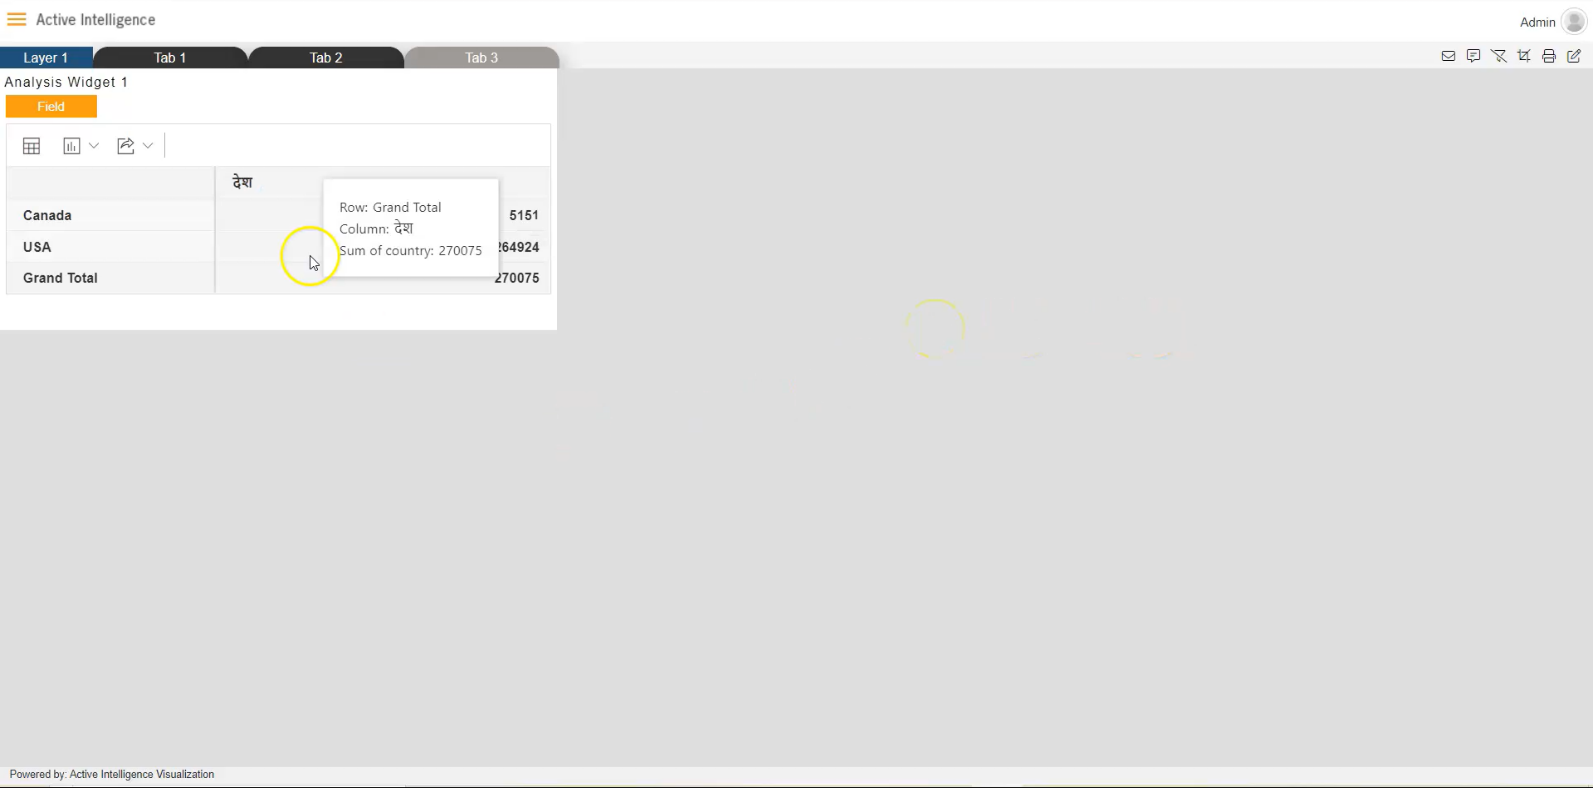
Create DML Language Alias dataset.
DML Language Alias tutorial: From this document you will learn to create the DML dataset which contains user required Alies.
Follow steps to create DML dataset in AIV:-
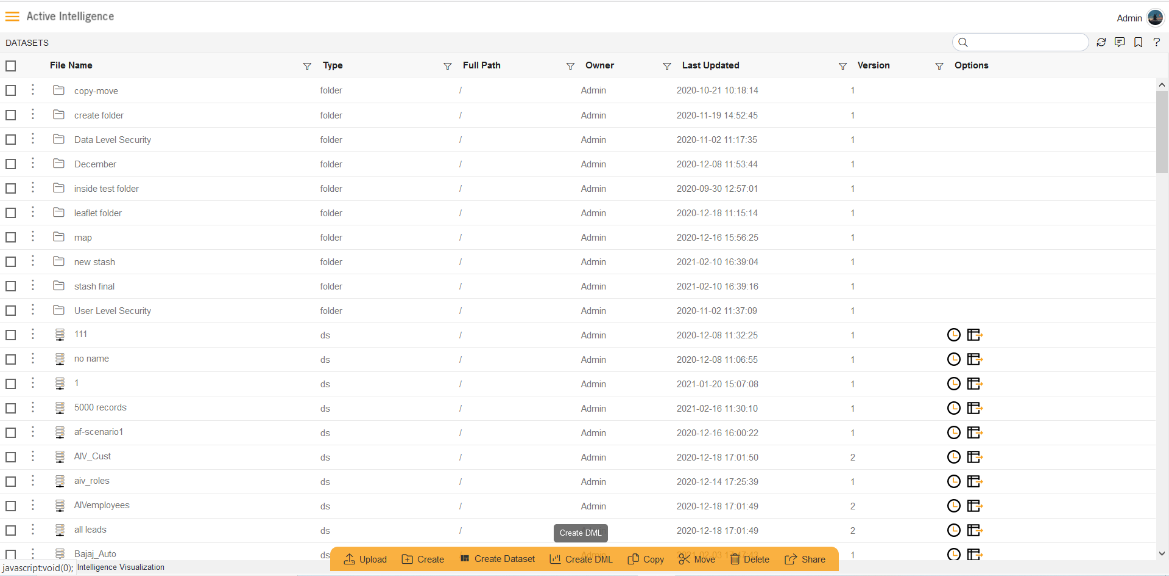
- Go to Dataset section, Click on Create DML from bottom menu bar. As shown in figure below:
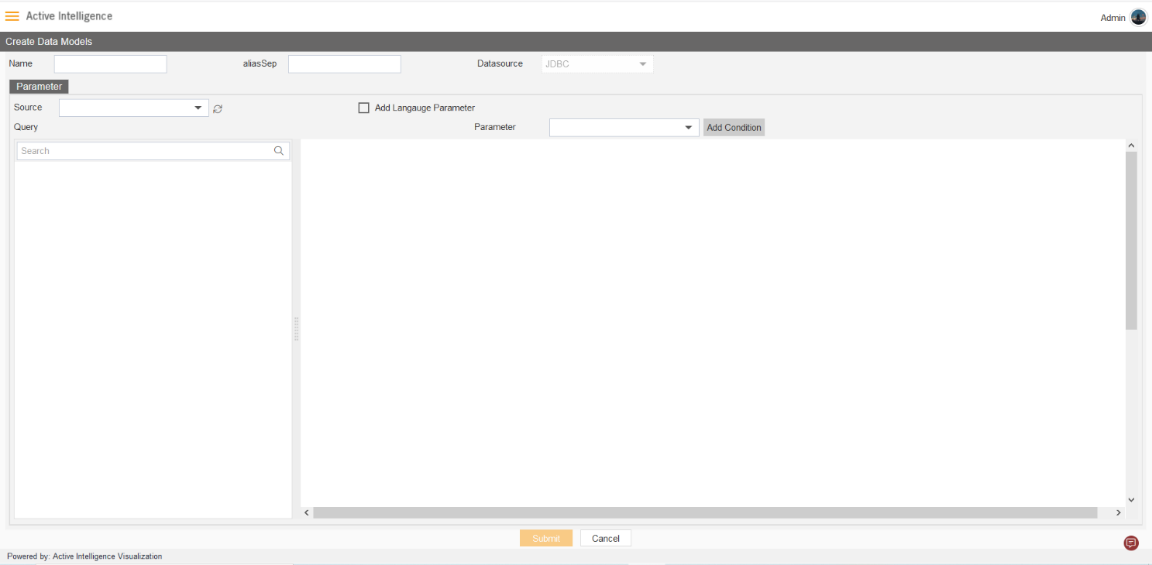
- The Create Data Module dialog box looks as shown in figure below:
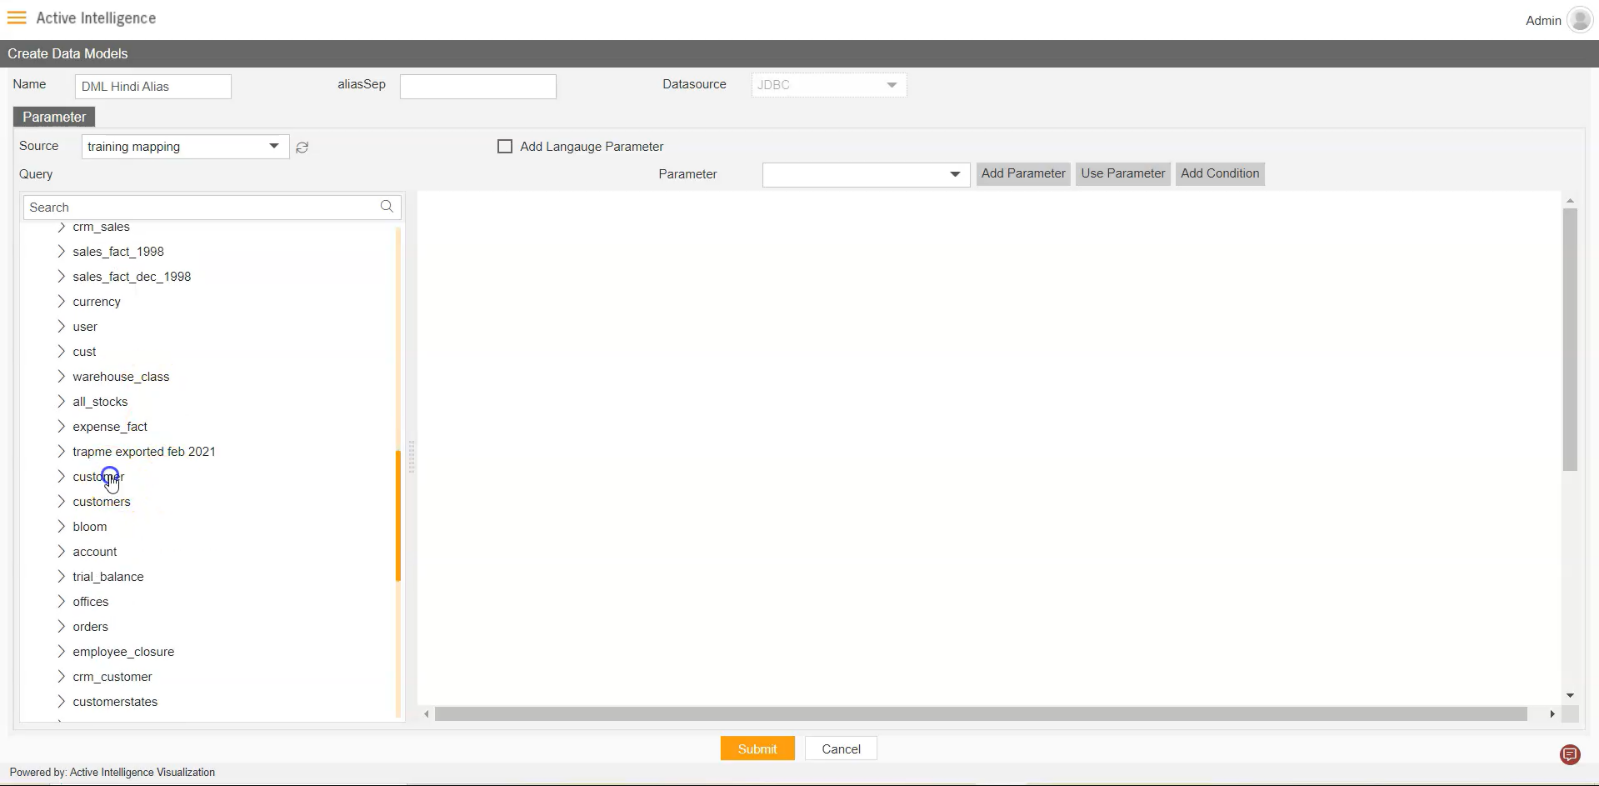
- Enter Following detail in DML Module dialog box:
Enter name: DML Hindi Alias Select Source: Training Mapping Expend tables from left side table view, As shown in figure below:
- Drag and Drop the CUSTOMER table from the table list box to diagram box, as shown in figure below:
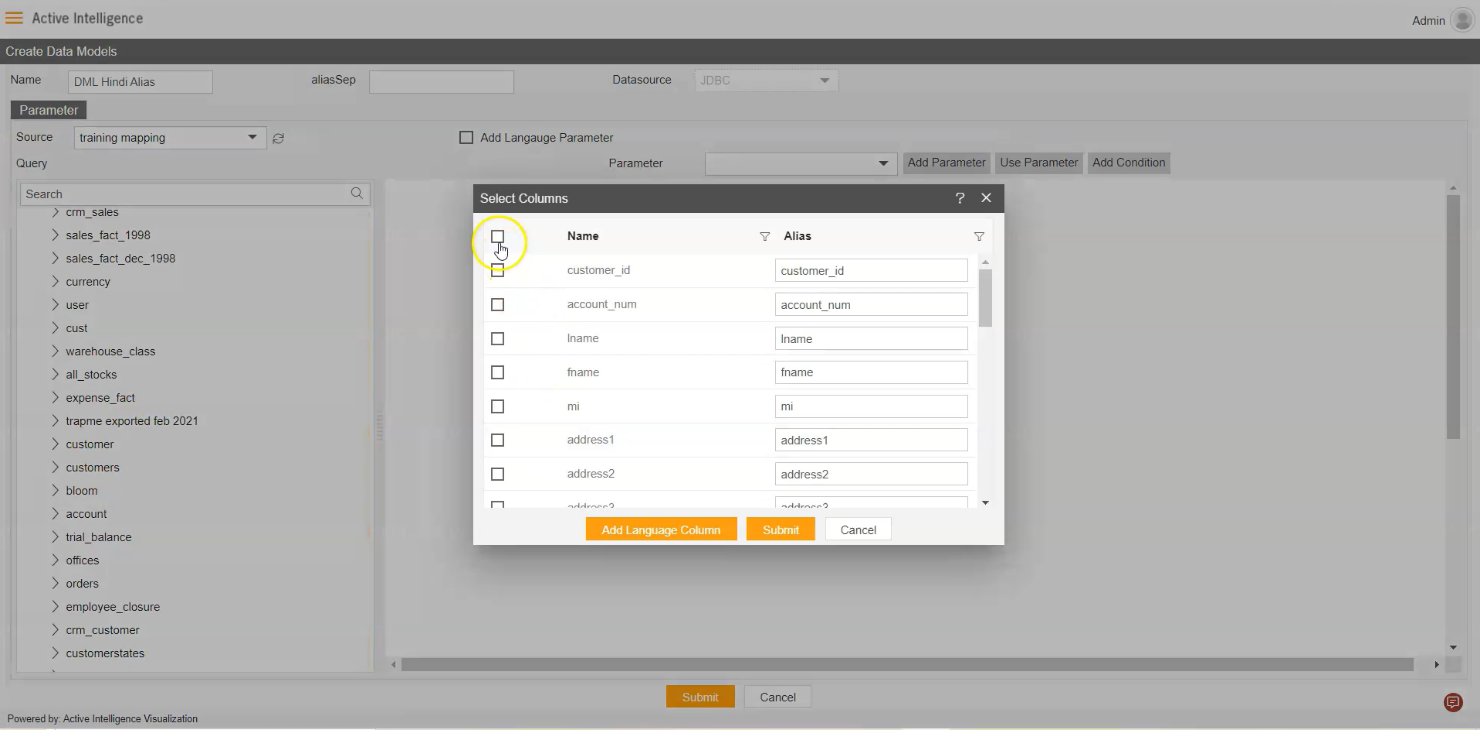
- To add Alias in Table, click on Add Language Column button, as shown in figure below:
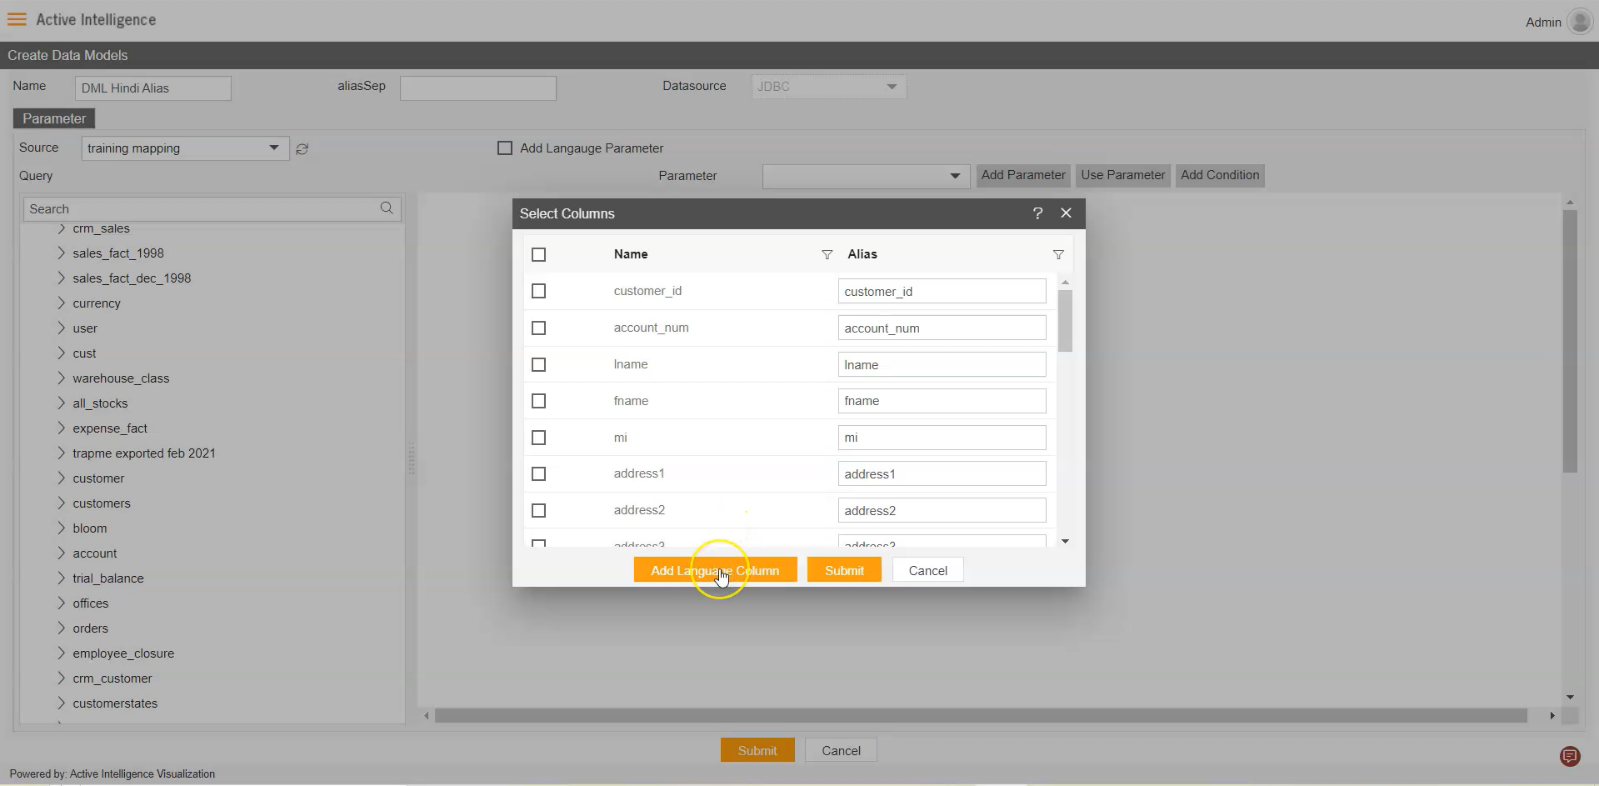
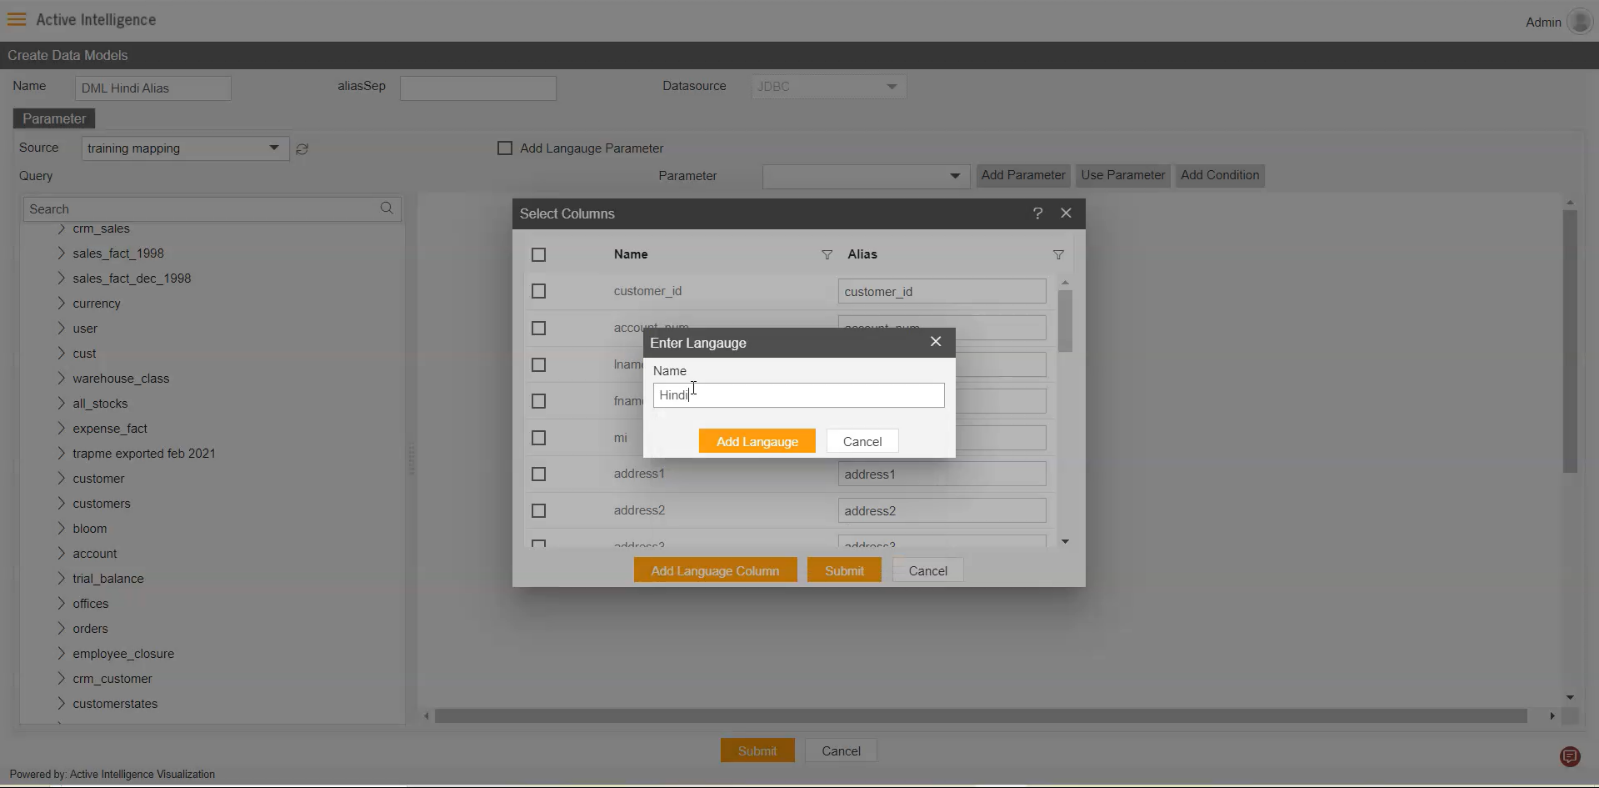
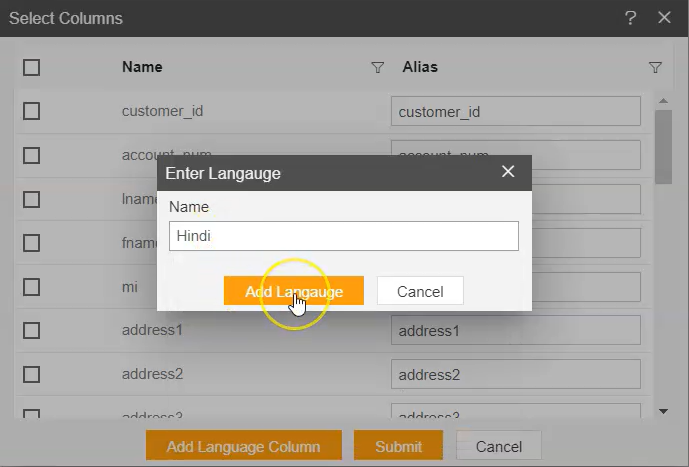
- Enter name of custom Alias as Hindi, Click on Add Language button. as shown in following figures.
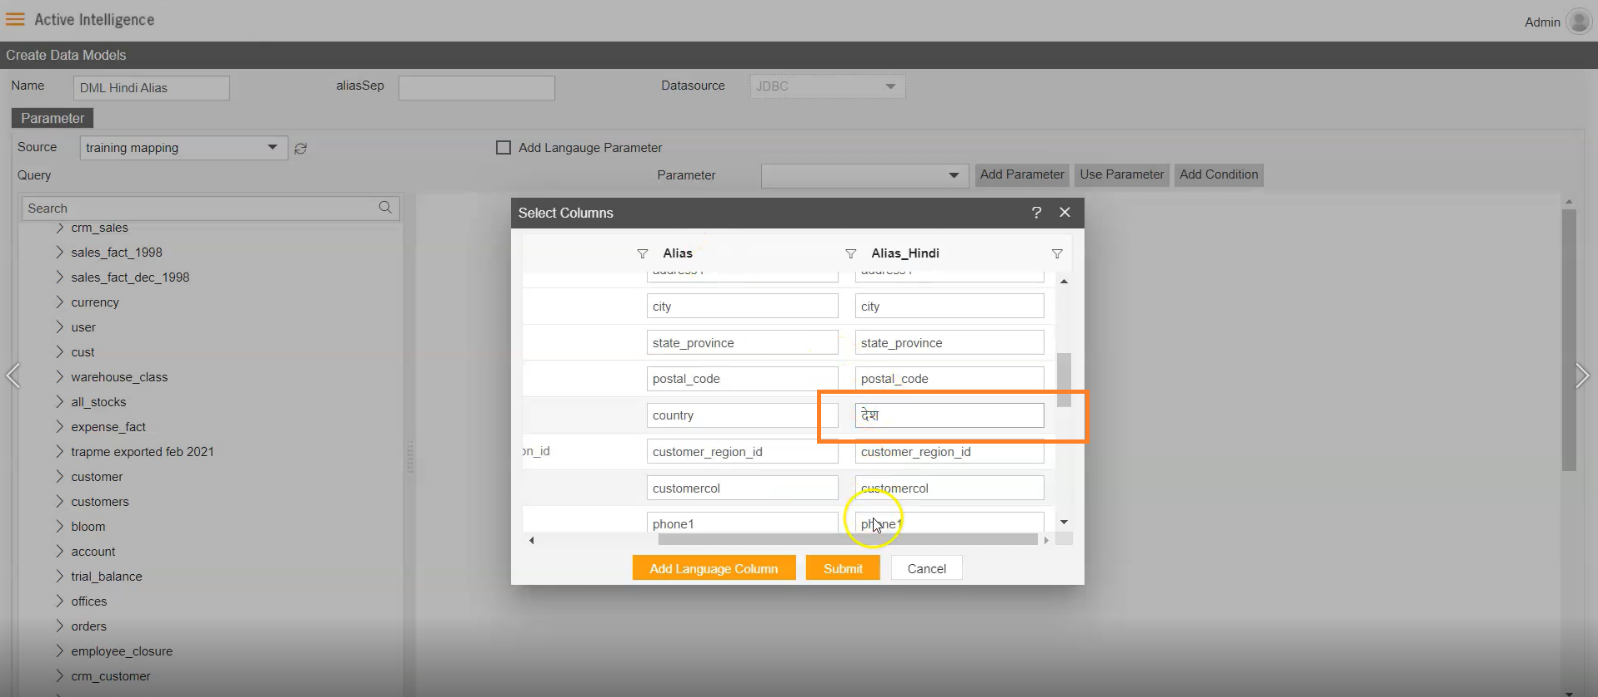
- After adding the Language Column, it used to visible in the Select column dialog box, as Alias_Hindi, Add Custom Name of the column you want to add language in, as shown in figure below:
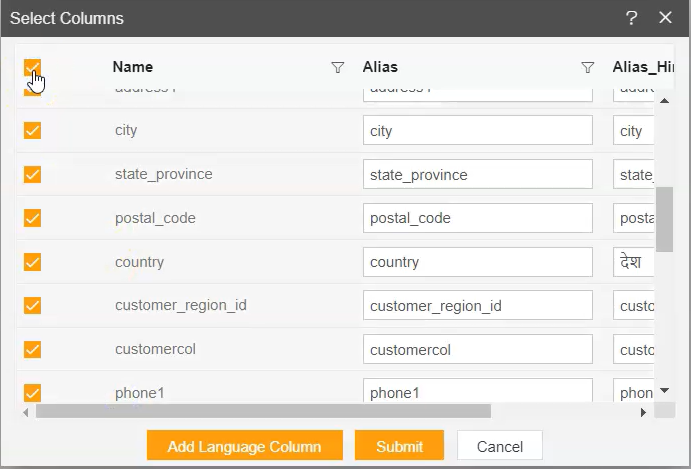
- Select all columns and click on Submit button as shown in figure below:
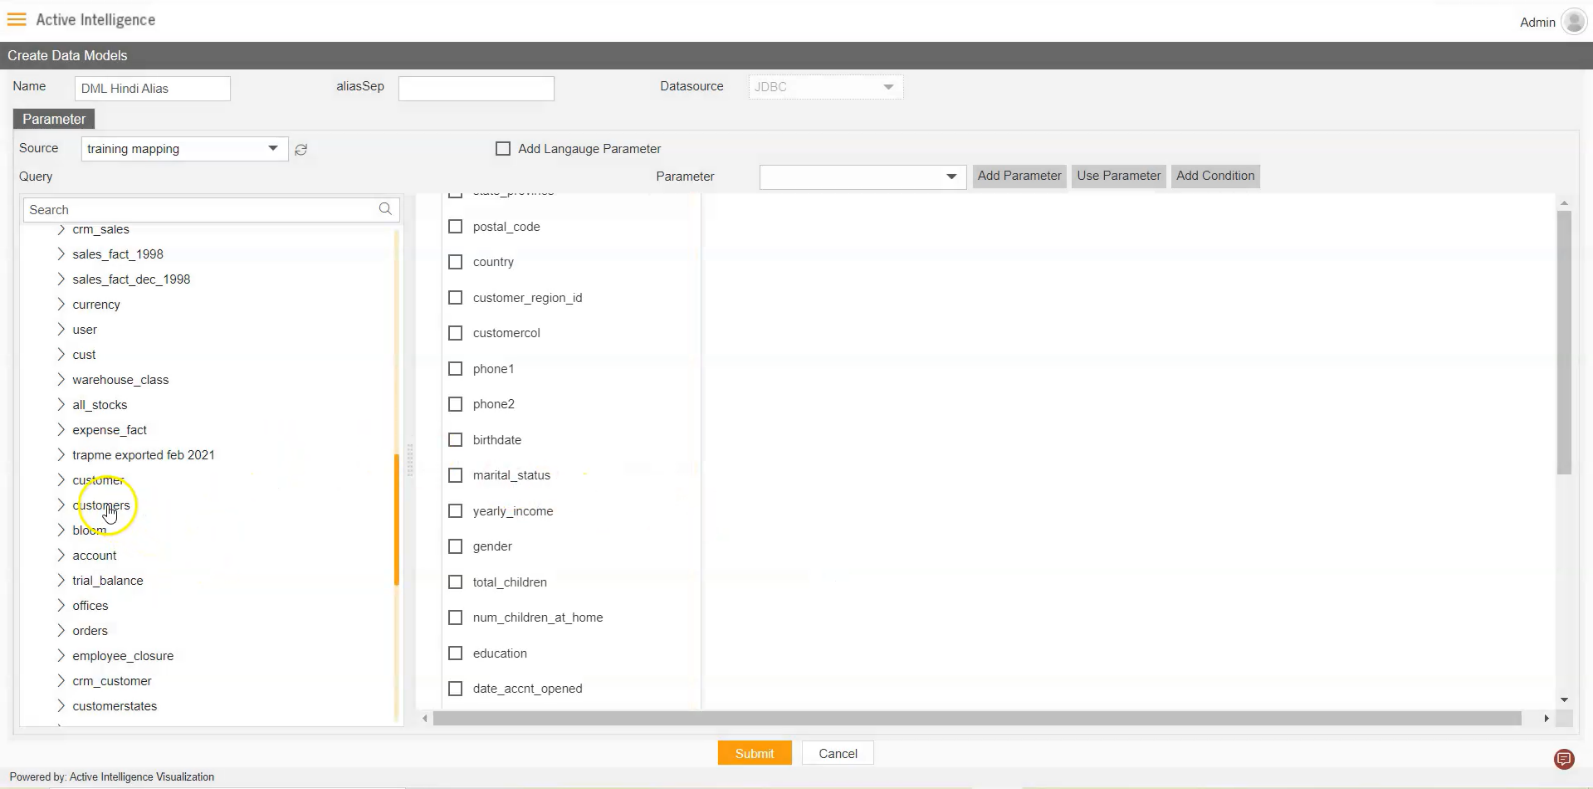
- Select and drag and drop the Customers table from the table list.
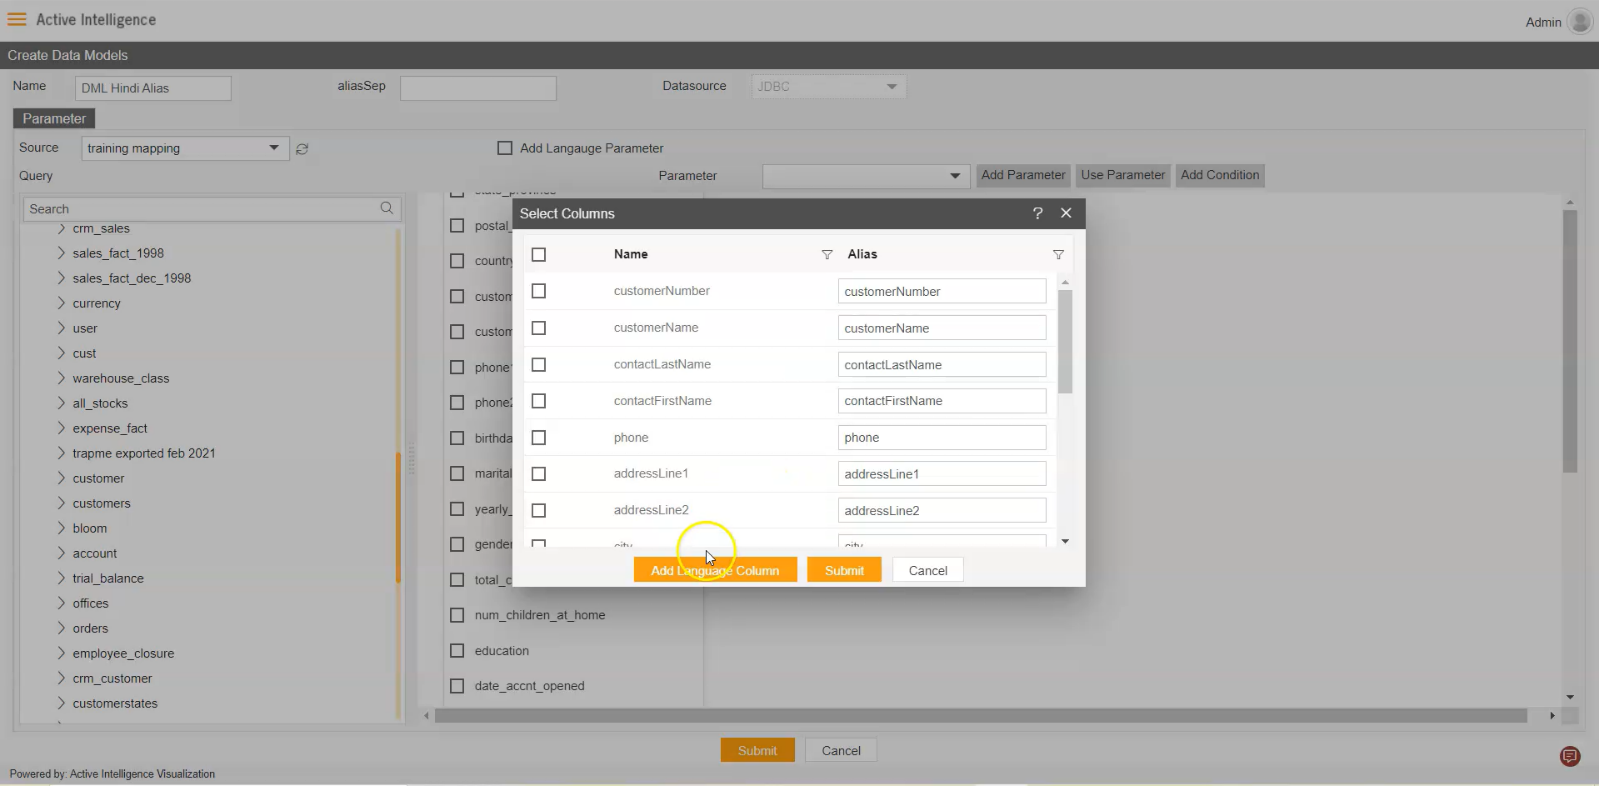
- Add Language Column, as shown in figure below:
- Add Custom name of the Alias Category Language as shown in figure below:
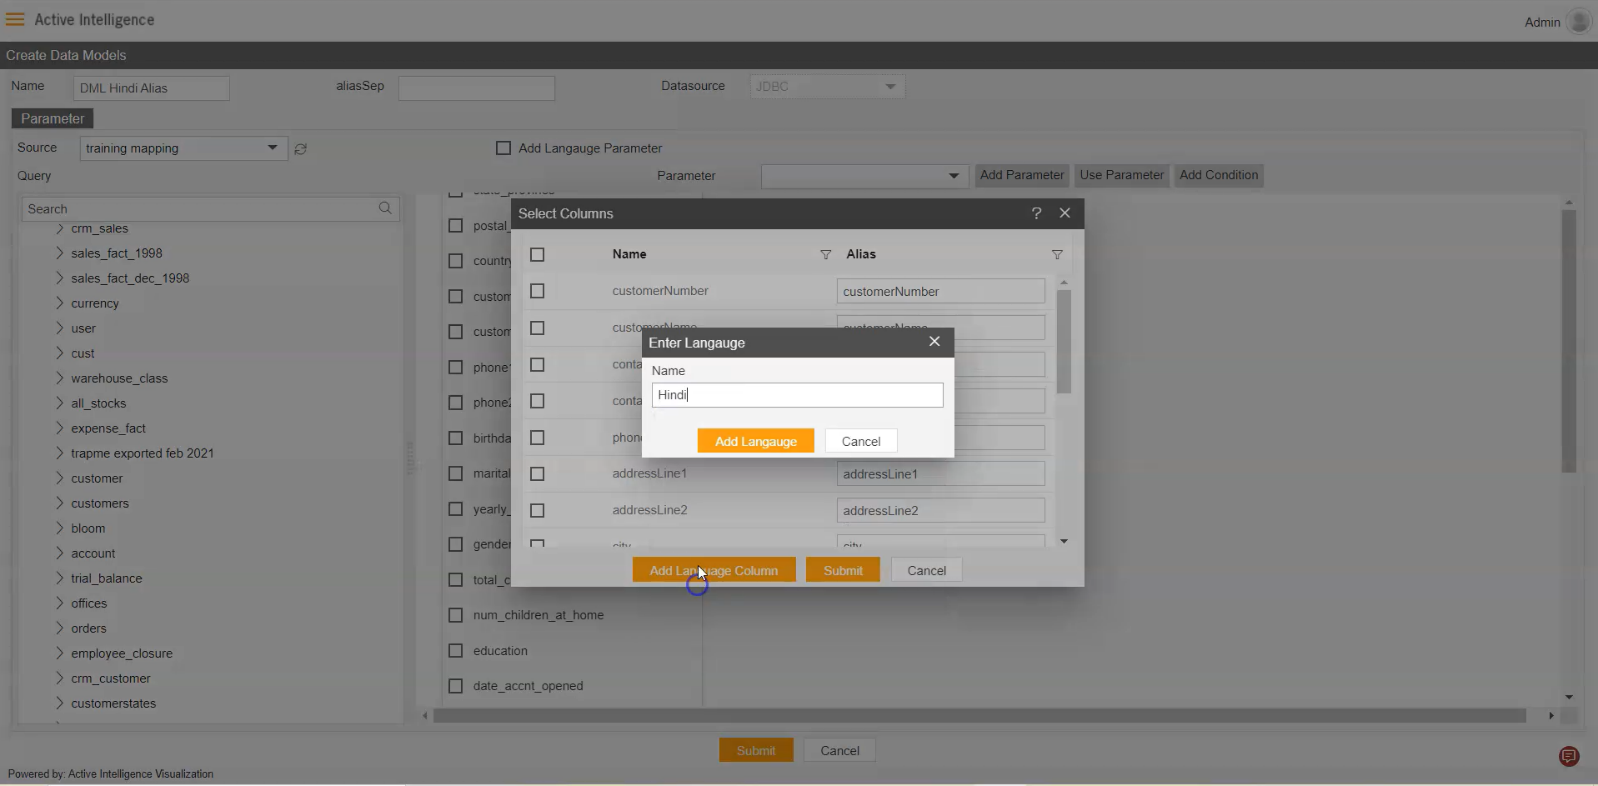
- Add Custom name of the Alias as shown in figure below:
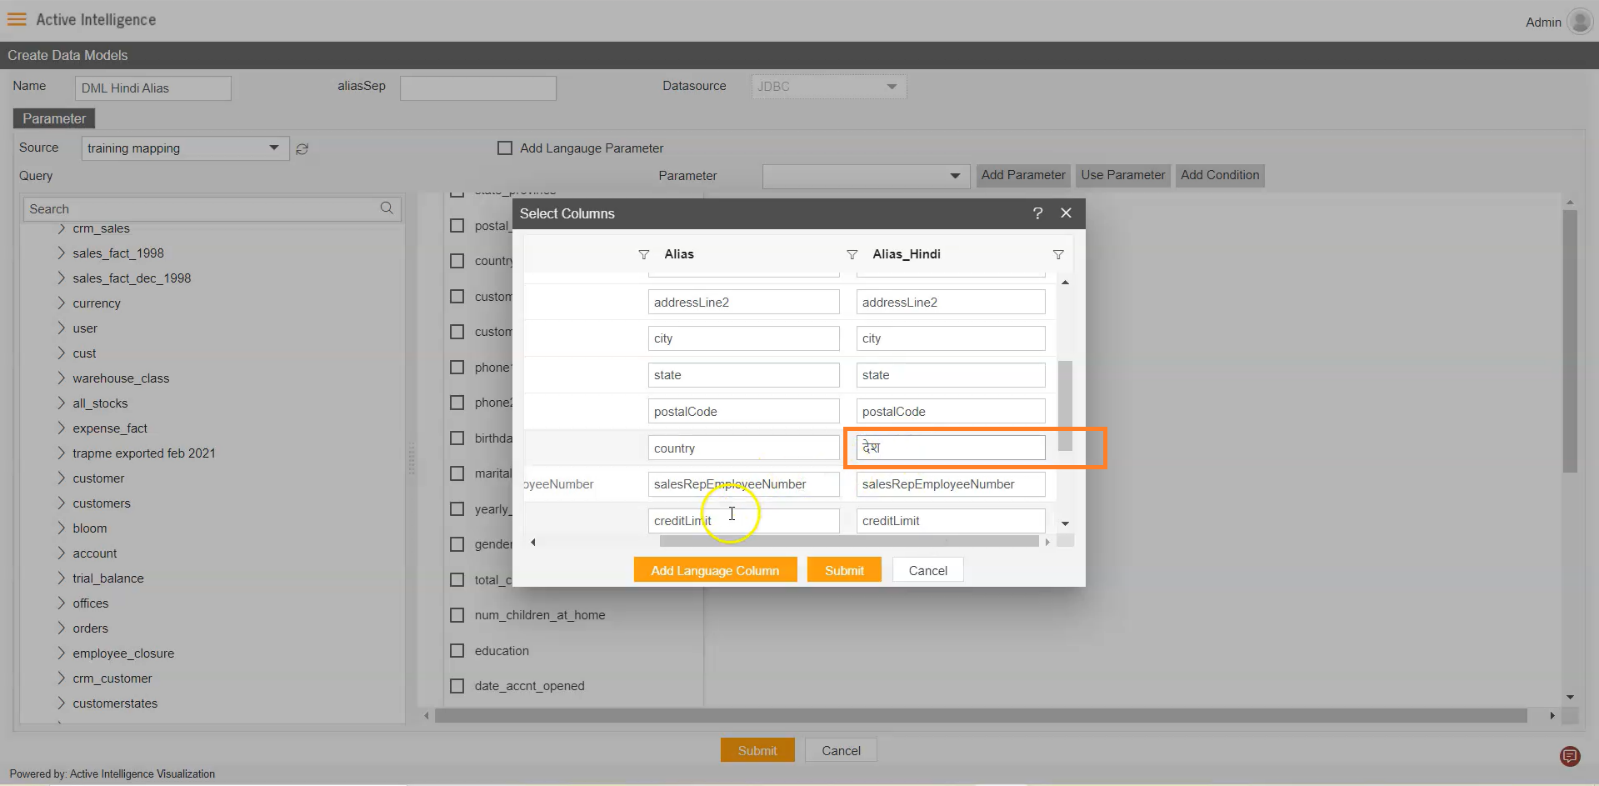
- Select all the columns of the CUSTOMERS table, click on save button, as shown in figure below:
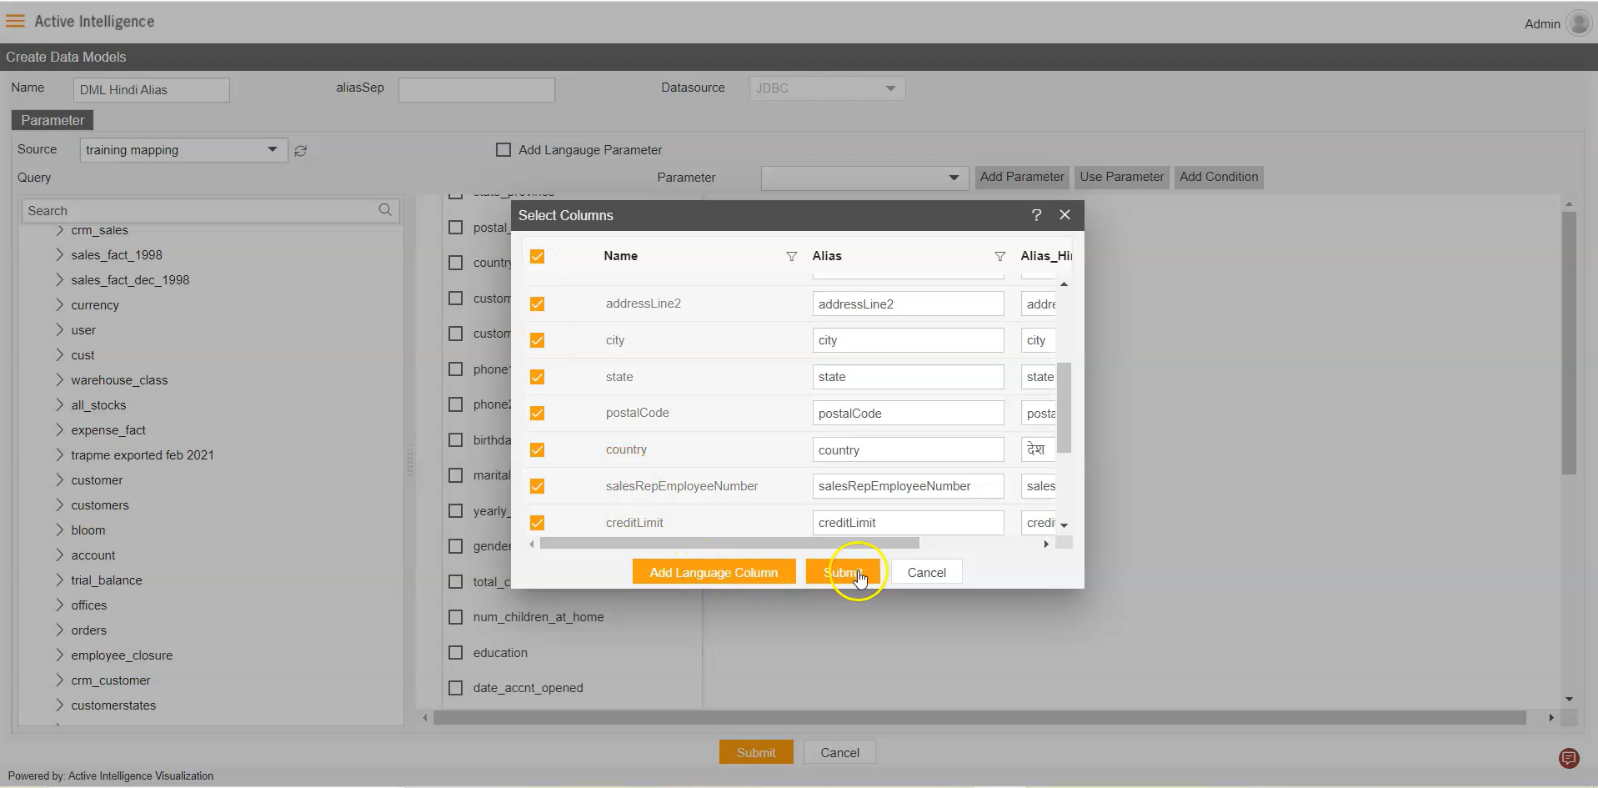
- Drag the country column from CUSTOMER to CUSTOMERS table field, as shown in figure below:
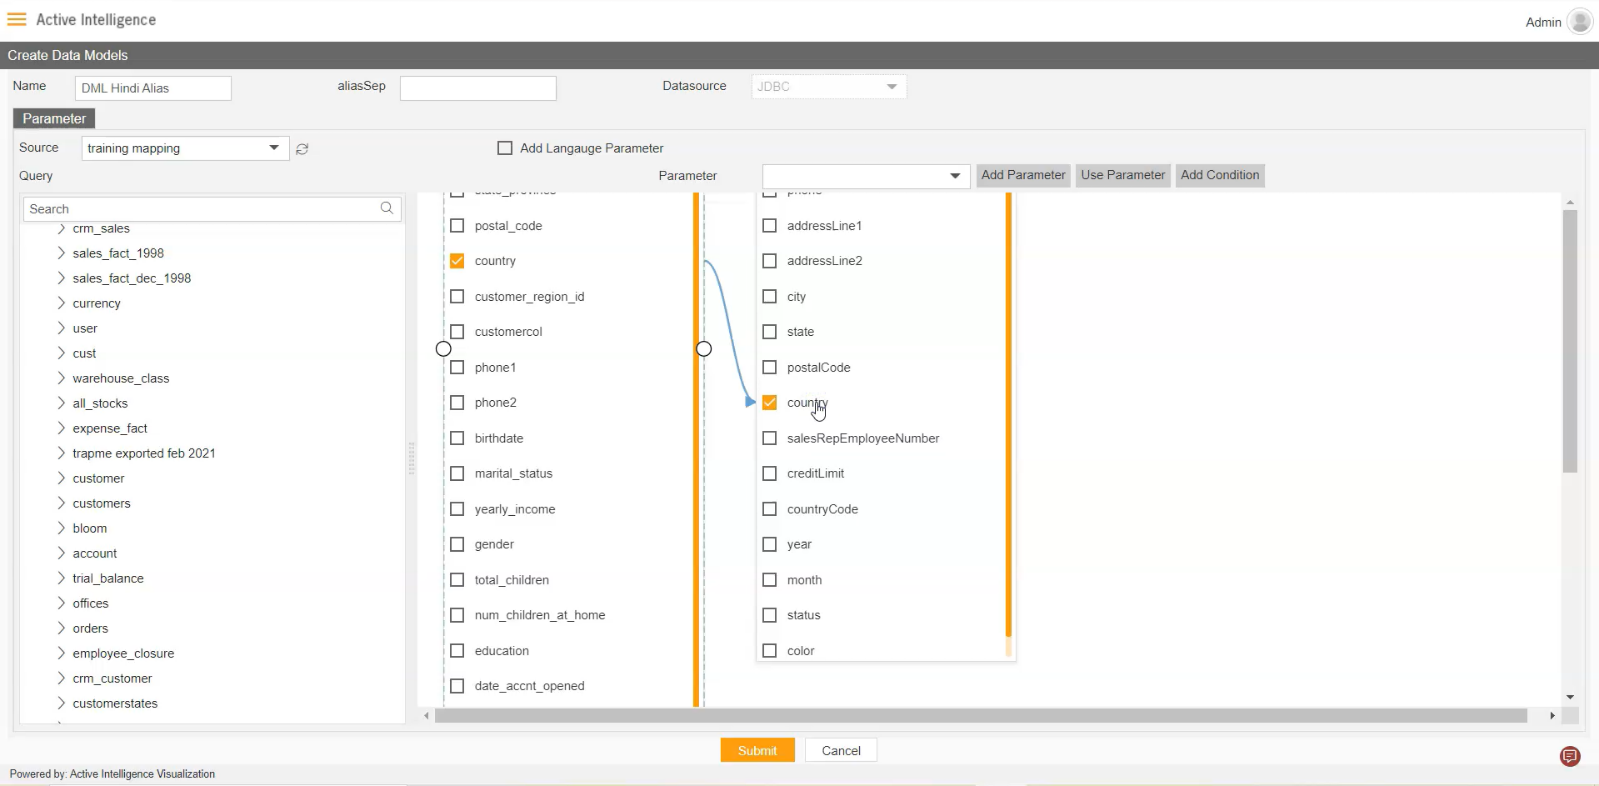
- Add aliasSap as (‘), as shown in figure below:
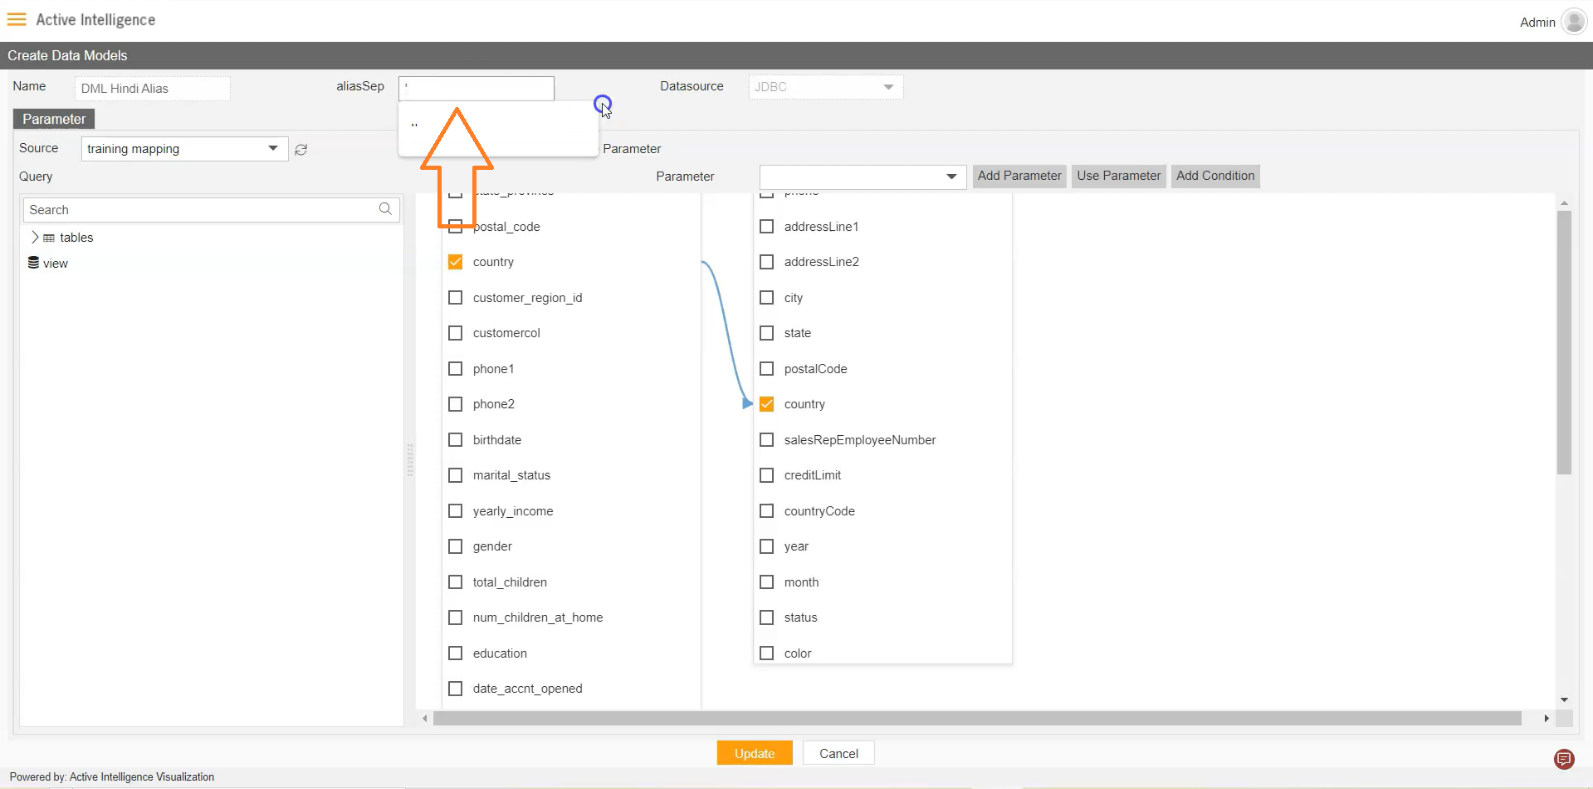
- Enable the Add Language Parameter by clicking the following Checkbox as shown in figure.
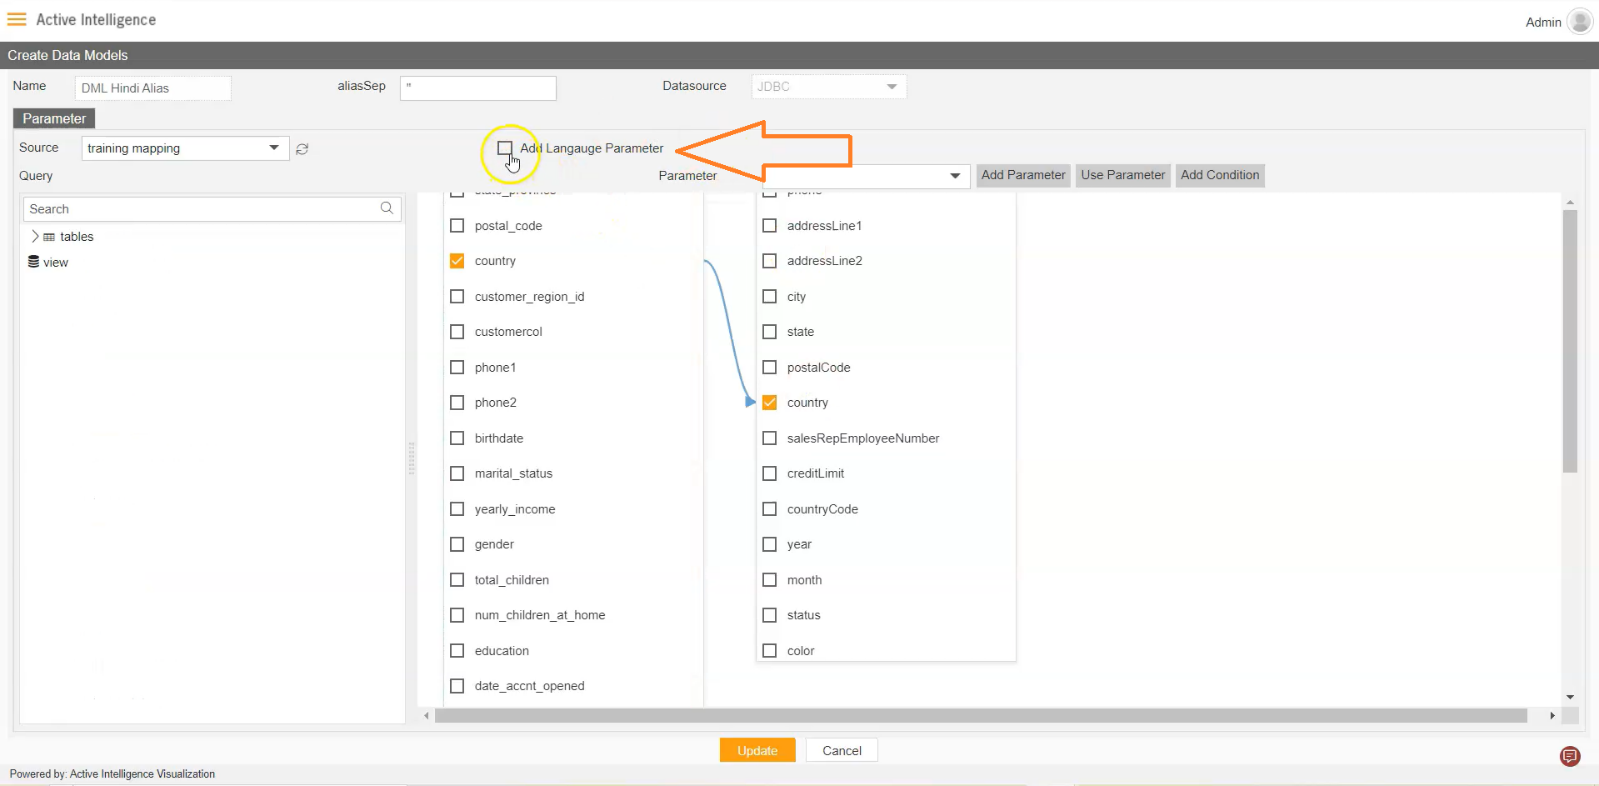
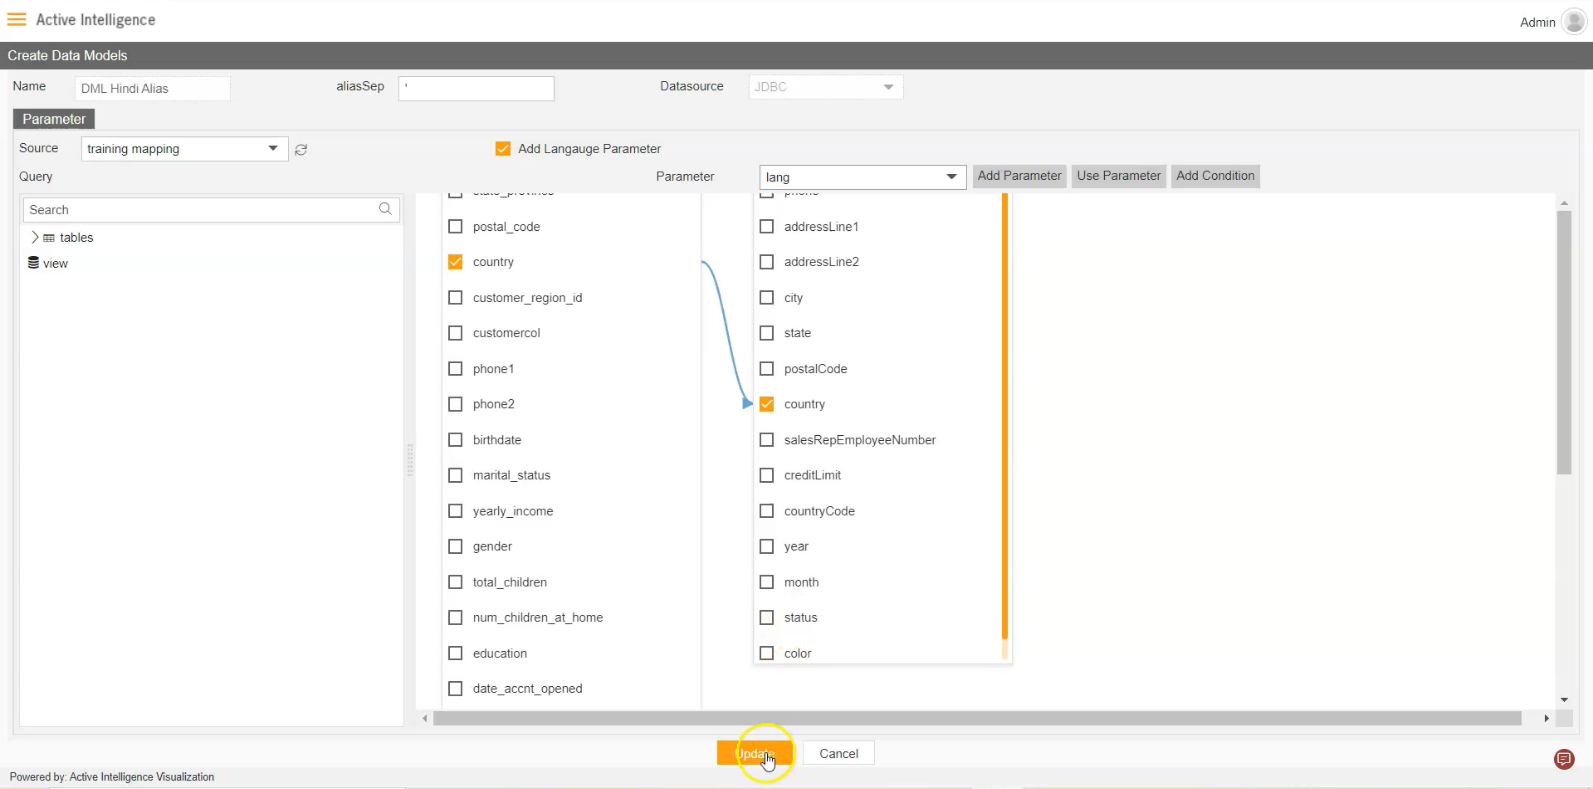
- After enabling the button will look like the following figure.
![]()
- Click on Submit button to complete the dataset.
- Go to Visualization section, add dashboard and click on Analysis icon to add widget into dashboard, as shown in figure.
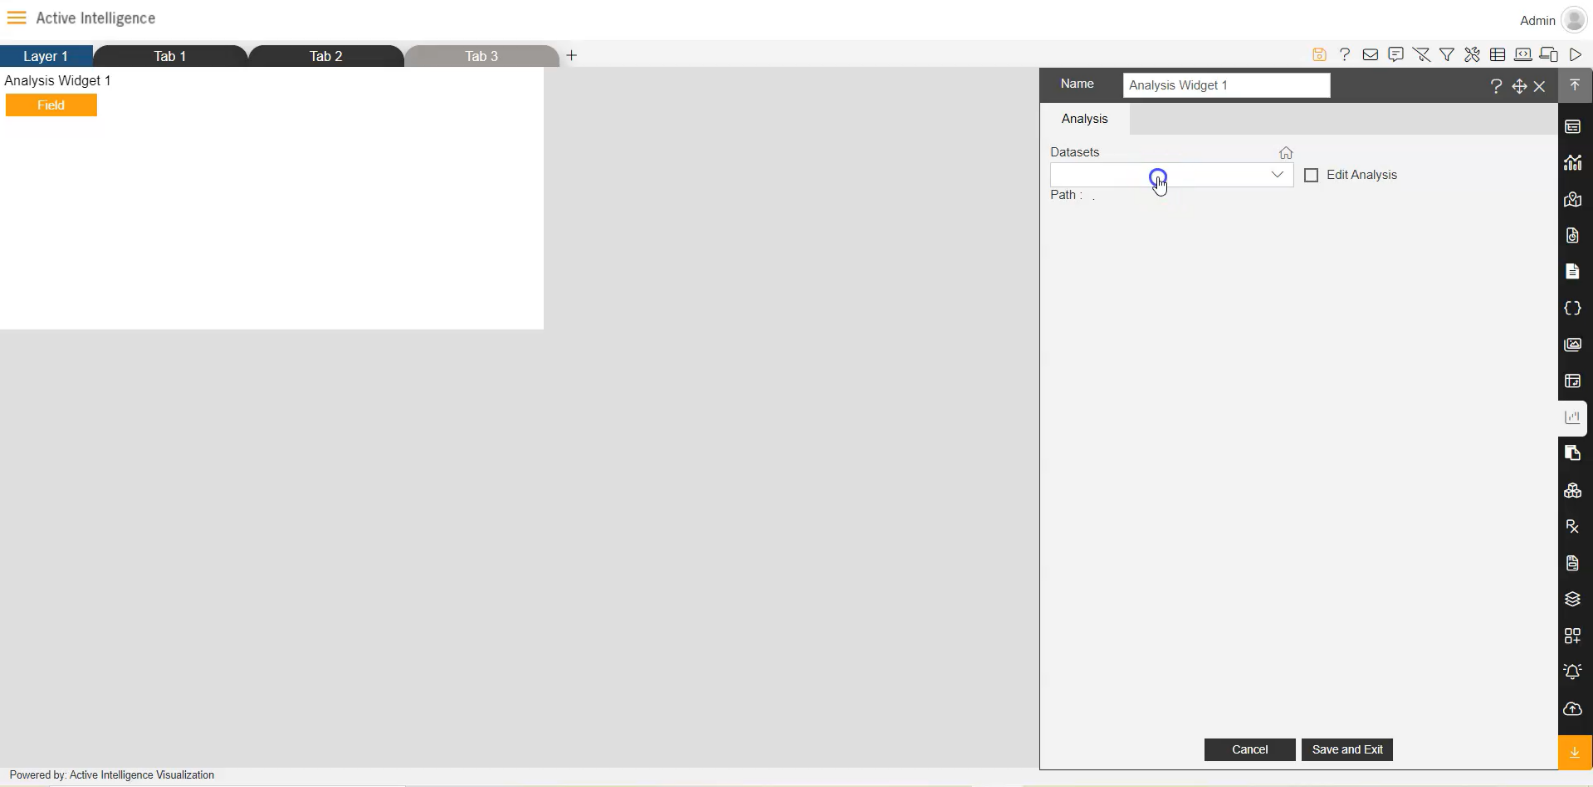
- Select DML_Hindi Alias.dml dataset, as shown in figure below:
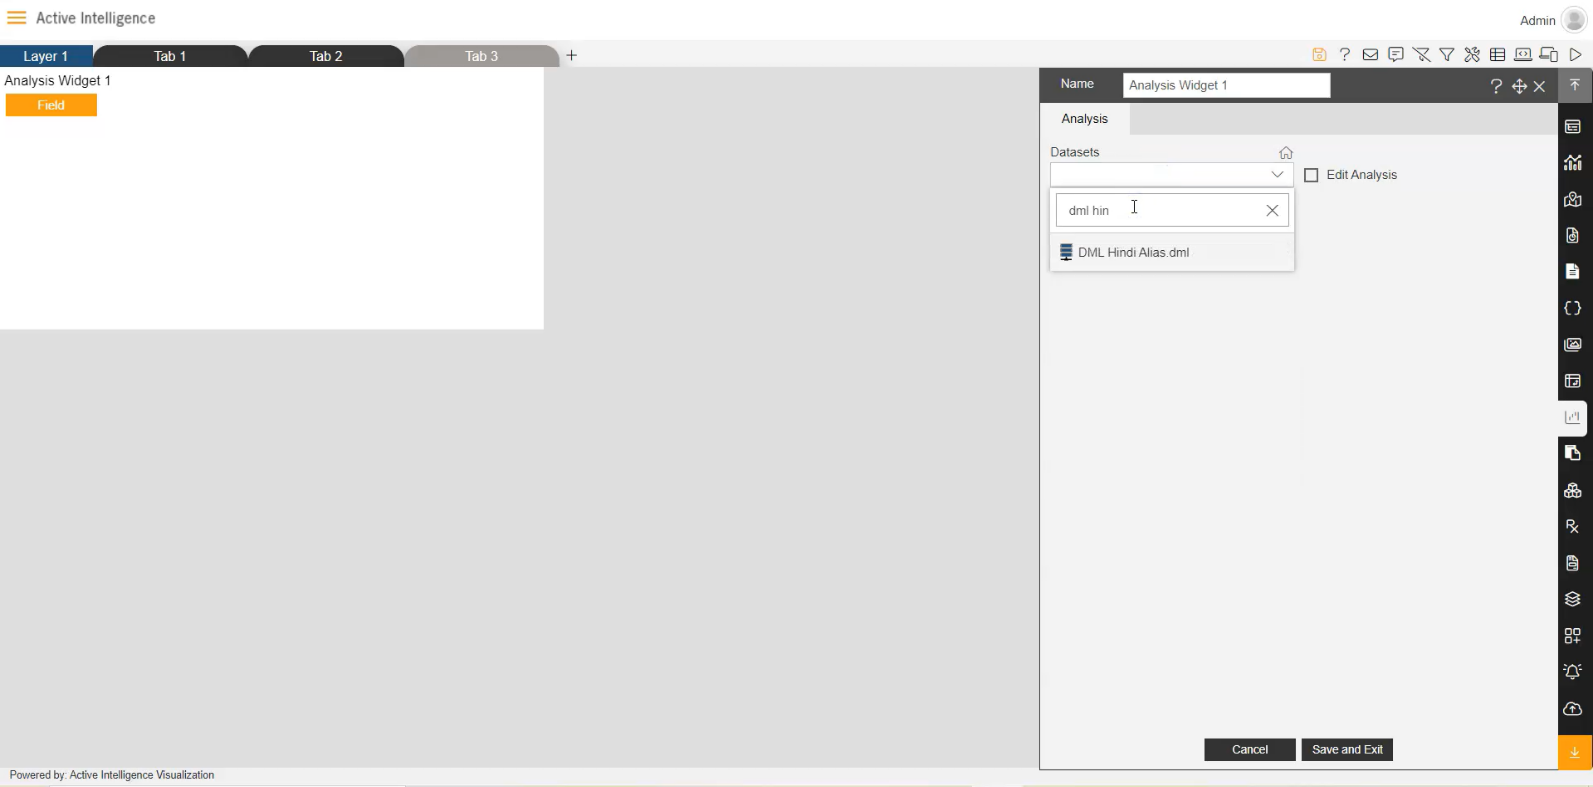
- Select Parameter Lang as Hindi in Dataset Parameter, as shown in figure below:
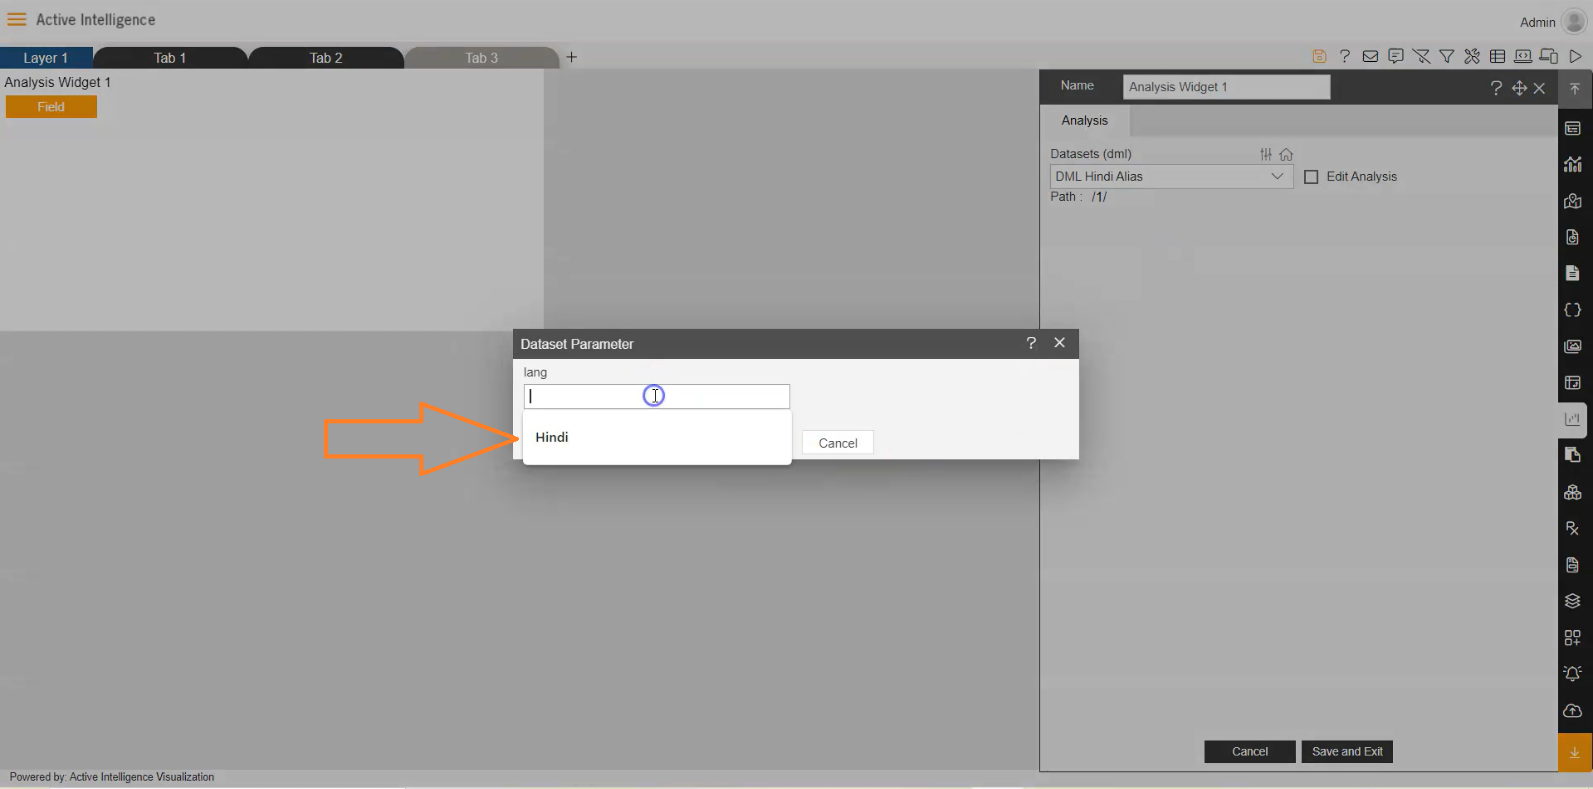
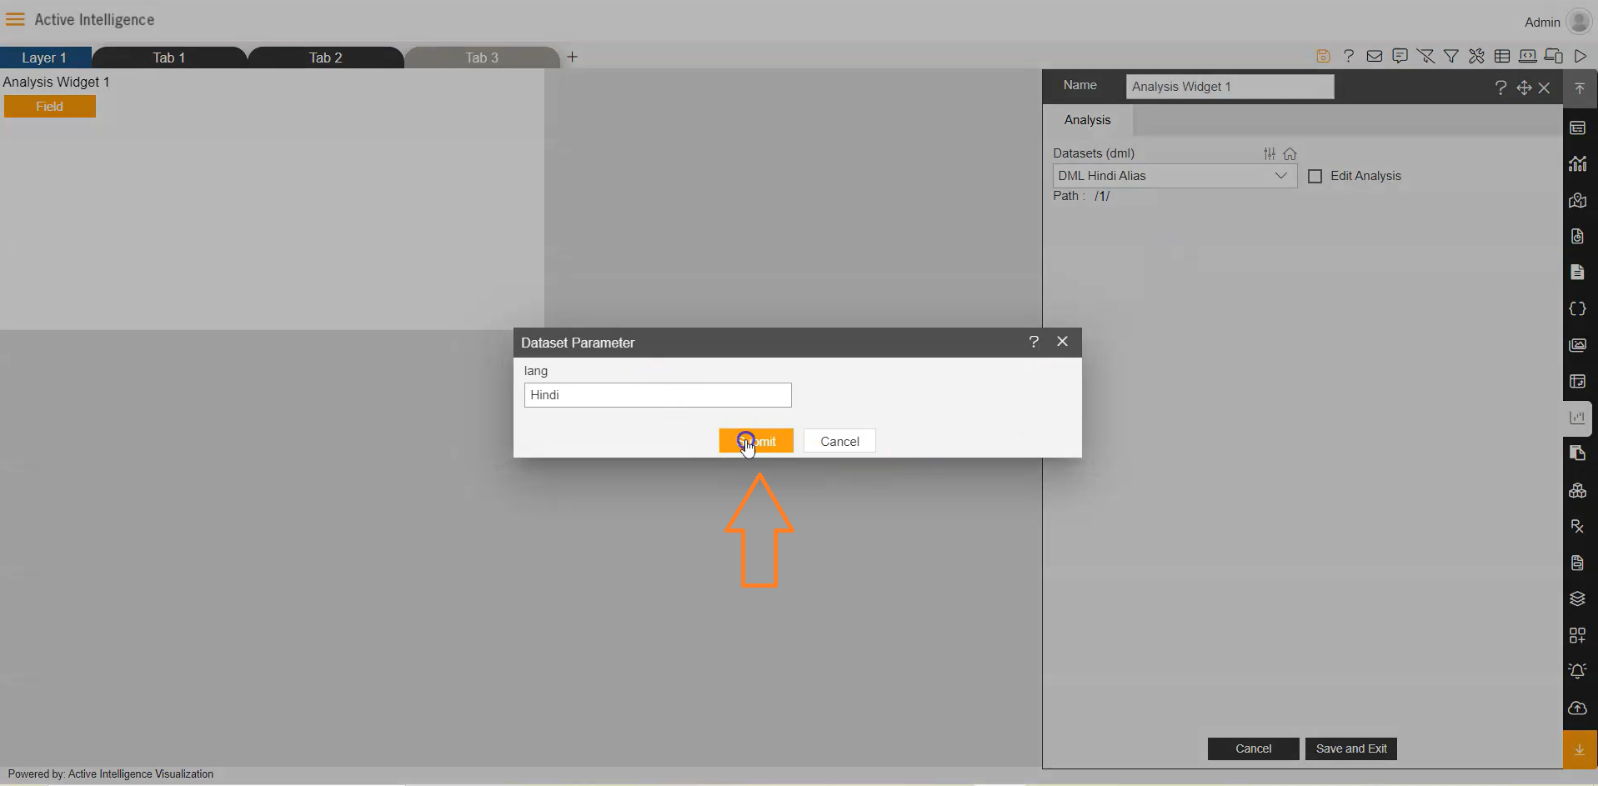
- Click Submit button to complete the parameter selection, as shown in figure below:
- Click on Field button, to add Analysis Selection columns, as shown in figure below:
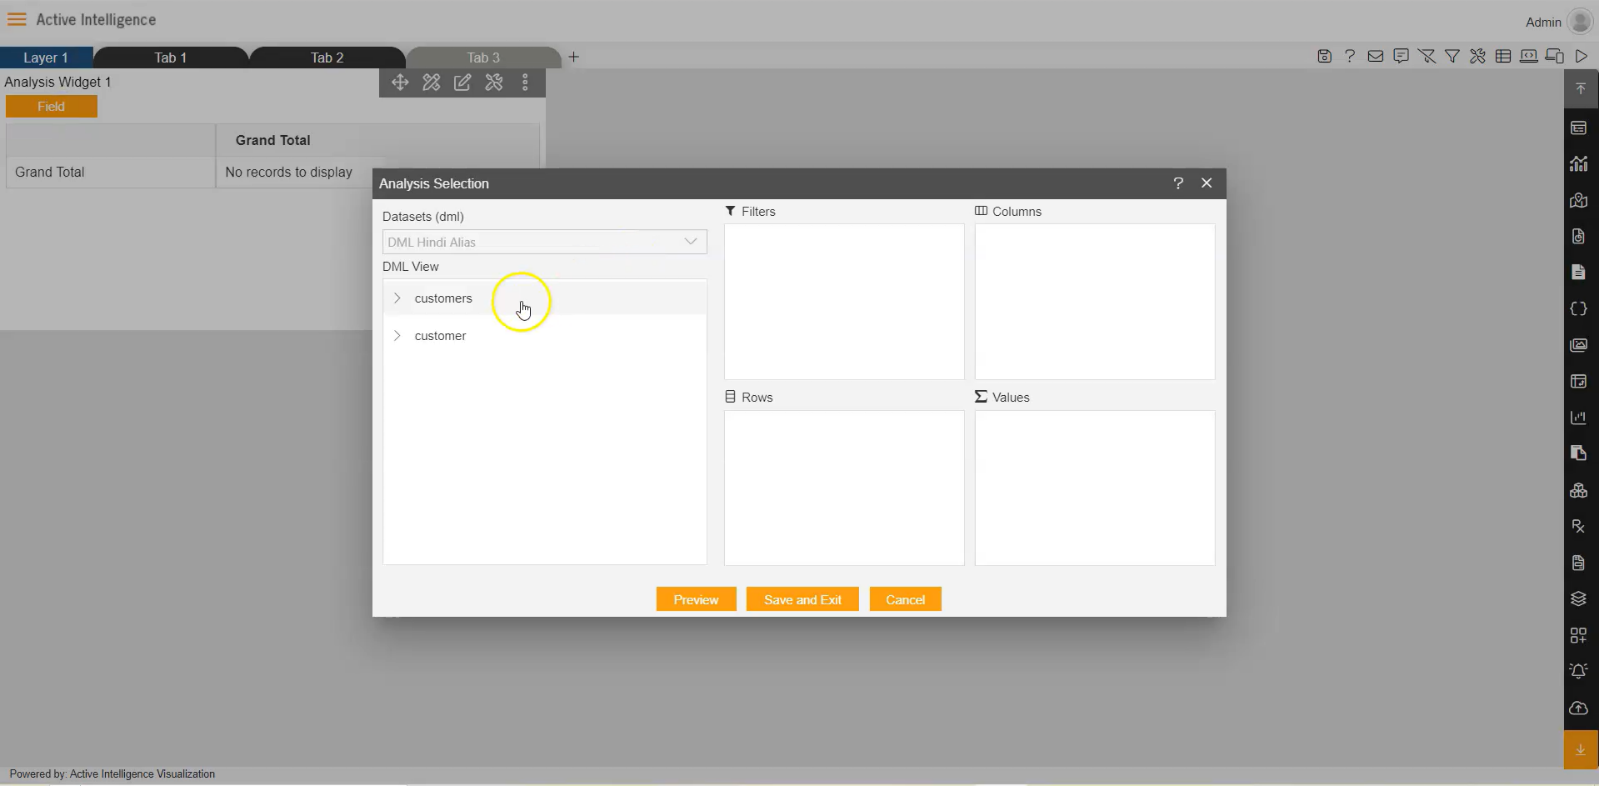
- Extend the CUSTOMERS table, Drag and drop the custom added column in rows, as shown in figure below:
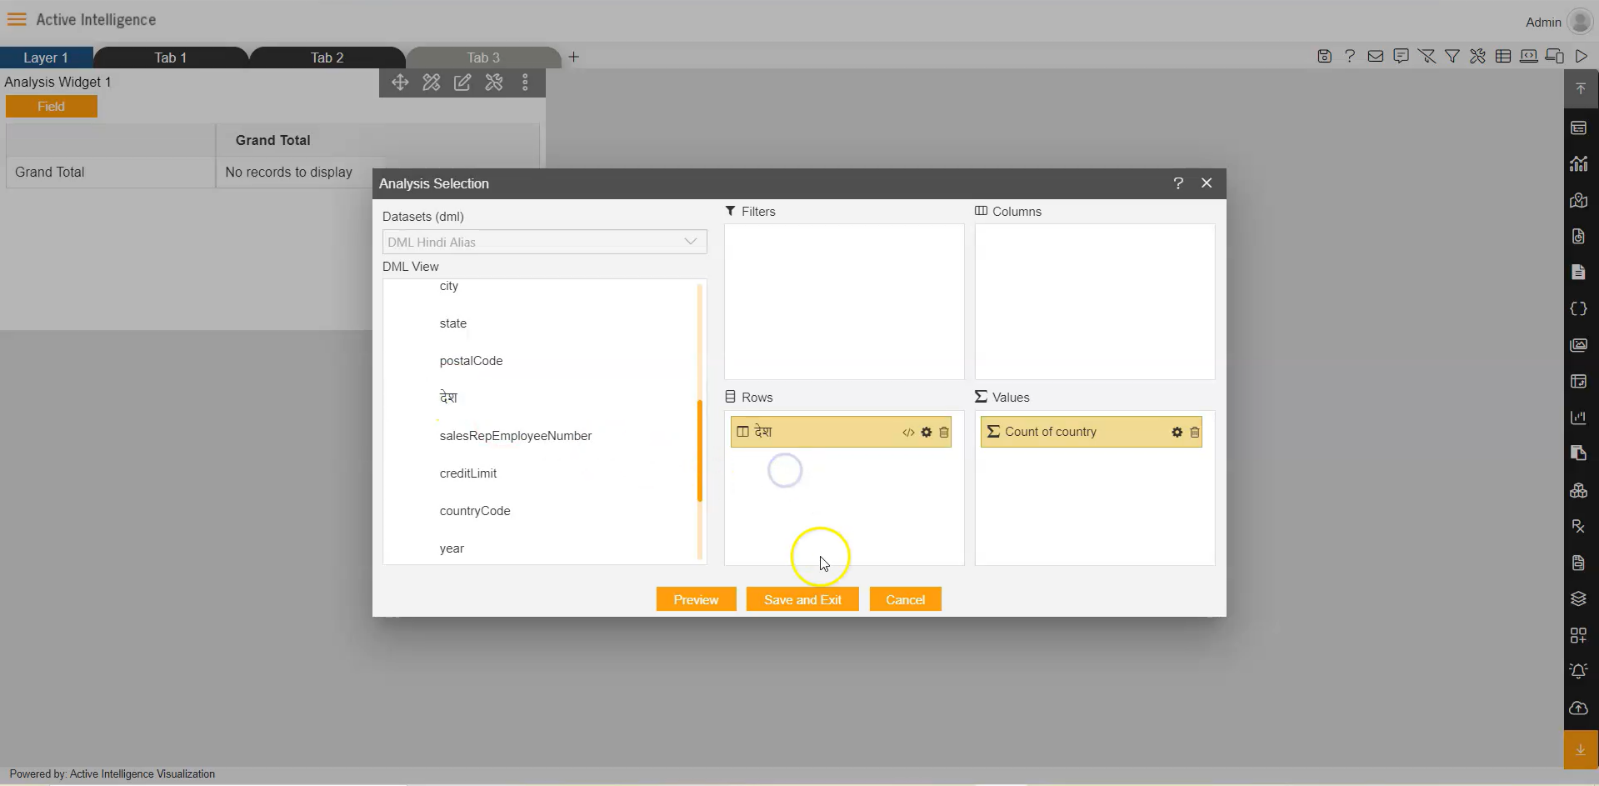
- Click on Preview button, and click on Save and Exit button to complete the Analysis Widget.
- Save the Widget in Dashboard and see the final output in Preview window by clicking Preview icon.
